Sweater Santa Hat
You'll Need:
1 Red or Burgundy Sweater
1 Cream, White, or Tan Sweater
Sewing Machine
Thread
Hand Sewing Needle
Fleece or Ribbon *This is optional, and just depends on how you make the ball for the end of the hat
Pins
{My new machine, when it worked, and I loved it}
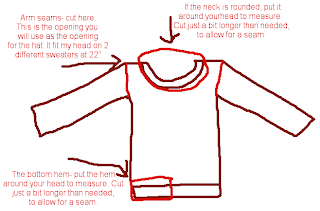
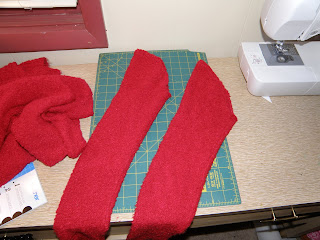
- Cut the sleeves off the sweater, at the seam. From here, try the sleeve on the person's head the hat is meant for, using the cut opening for the head. If it fits, you can move on. If it's too big, pull it tight, and pin where you will need to sew. If it is too tight, cut the seam off. If the seam was already cut off, but is not too tight, move on, as this part is not actually the part that will go around your head.
- Once the arm opening for the sleeve works right and fits around your head, measure the waist or (if it is rounded and not V shaped, boat shaped, or square) neck of the cream/white/tan sweater. To do this, do NOT use a measuring tape, as the material will stretch. Use your head, and wrap it around, pulling it taut. cut this portion of the sweater hem off.
- Pin the two sections together, with the sleeve turned right side out, and the hem inside out & upside down. You want to pin it so the raw side is pined to the sleeve, allowing for the finished side to be unsewn.
- Sew a zig zag stitch around the pinned side, so the hem is firmly attached to the hat. I always leave the two ends of the hem free until it is attached to the hat, then I sew them together, and add another stitch to the top to attach the ends to the hat.
- For the end of the hat, you can do a few things. You could attach a bell to a ribbon, and attach it to the end, pulling the material into as tight of a V shape as you can, and hand stitching it together. You can use fleece to make a fleece fringe ball, and again, hand sew it in. What I did with this particular hat, though, is take a square of the cream sweater, and fold & roll it into a ball shape, then hand stitch it into that shape. From there, I hand stitched it to the end of the sleeve. When I pulled it out, it looked odd, though, so I used ribbon to tie a tight bow in place, then I hand stitched the bow to the hat, so it won't untie.
- The last thing I did was to run a straight hand stitch loosely down the seam of the sleeve, from the opening to the top of the hat. Then, I pulled it, so that the underside of the sleeve gathered up.
They are just adorable, and while a traditional hat is red and white, you can certainly customize it to meet your needs- matching jacket color, different colors for different kids, etc. My oldest daughter and my son both requested red with green instead of white. I made mine with a burgundy colored sweater, and cream sweater, so it looks more old fashioned.
The nice thing about these, are that they are custom fit, so they stay on, and they are warm, so they can be warn as winter hats.
My cost per hat is roughly $.79, as that's how much I pay per sweater at Goodwill. Honestly, though, the cost is cheaper than that, as I still have plenty of the sweater material left over after having made 2 of these.


4 comments:
Hi Heather,
I just wanted to thank you for the wonderful bag of goodies you sent for winning your first blog contest. The fleece hat is adorable, and my 5-year old son really likes the robot trim. I put the hand warmers on as soon as I received them, then went to pick up my son at school. My son saw them, and said, "Are those from that online contest you won?" When I said they were, he said, "You know, those are really nice. I could use those at school." Needless to say, he's ended up with the hat, hand warmers, bendy Christmas straw, bracelet, and holiday stickers, and is thrilled to have them. I was happily surprised to find that you'd included a gift card for the Dollar Store, too! THANKS! I'm planning to go and pick up some things I can use to make some of the great crafts you've written about on your blog. Thank you, once again, for your generosity. We very much appreciate it!
Cheers,
Lesley
I'm so glad he liked it! The gift card was originally the surprise gift, but I had all the Christmas stuff left over from stuffing Christmas cups for my nieces. ;)
Heather
Very cute idea.
You gals are so creative.
Cheri
so darling!!!thanks for linking!
Post a Comment