
Now that I'm taking an active interest in being more active, I wanted some music to listen to while I do it. I talked to Nick, and we decided that we could afford an MP3 player for me this week, so off I went. I found a 4GB MP3 player that also does voice record, plays videos, and stores pictures, and it was only $50. Ok, "Only"... I think it's high priced for what is essentially a toy, but I got it anyway.
The downside- the store had no accessories for this model, and I wanted some way to clip it to my clothing or body, so it wouldn't get lost, or fall from a pocket. So, what did I do? Got out my sewing machine. Three different times, actually!

You'll Need:
Fabric Remnants- I used 3 different prints
Sewing machine
Elastic
Button
Needle & Thread
Fabric marking pen
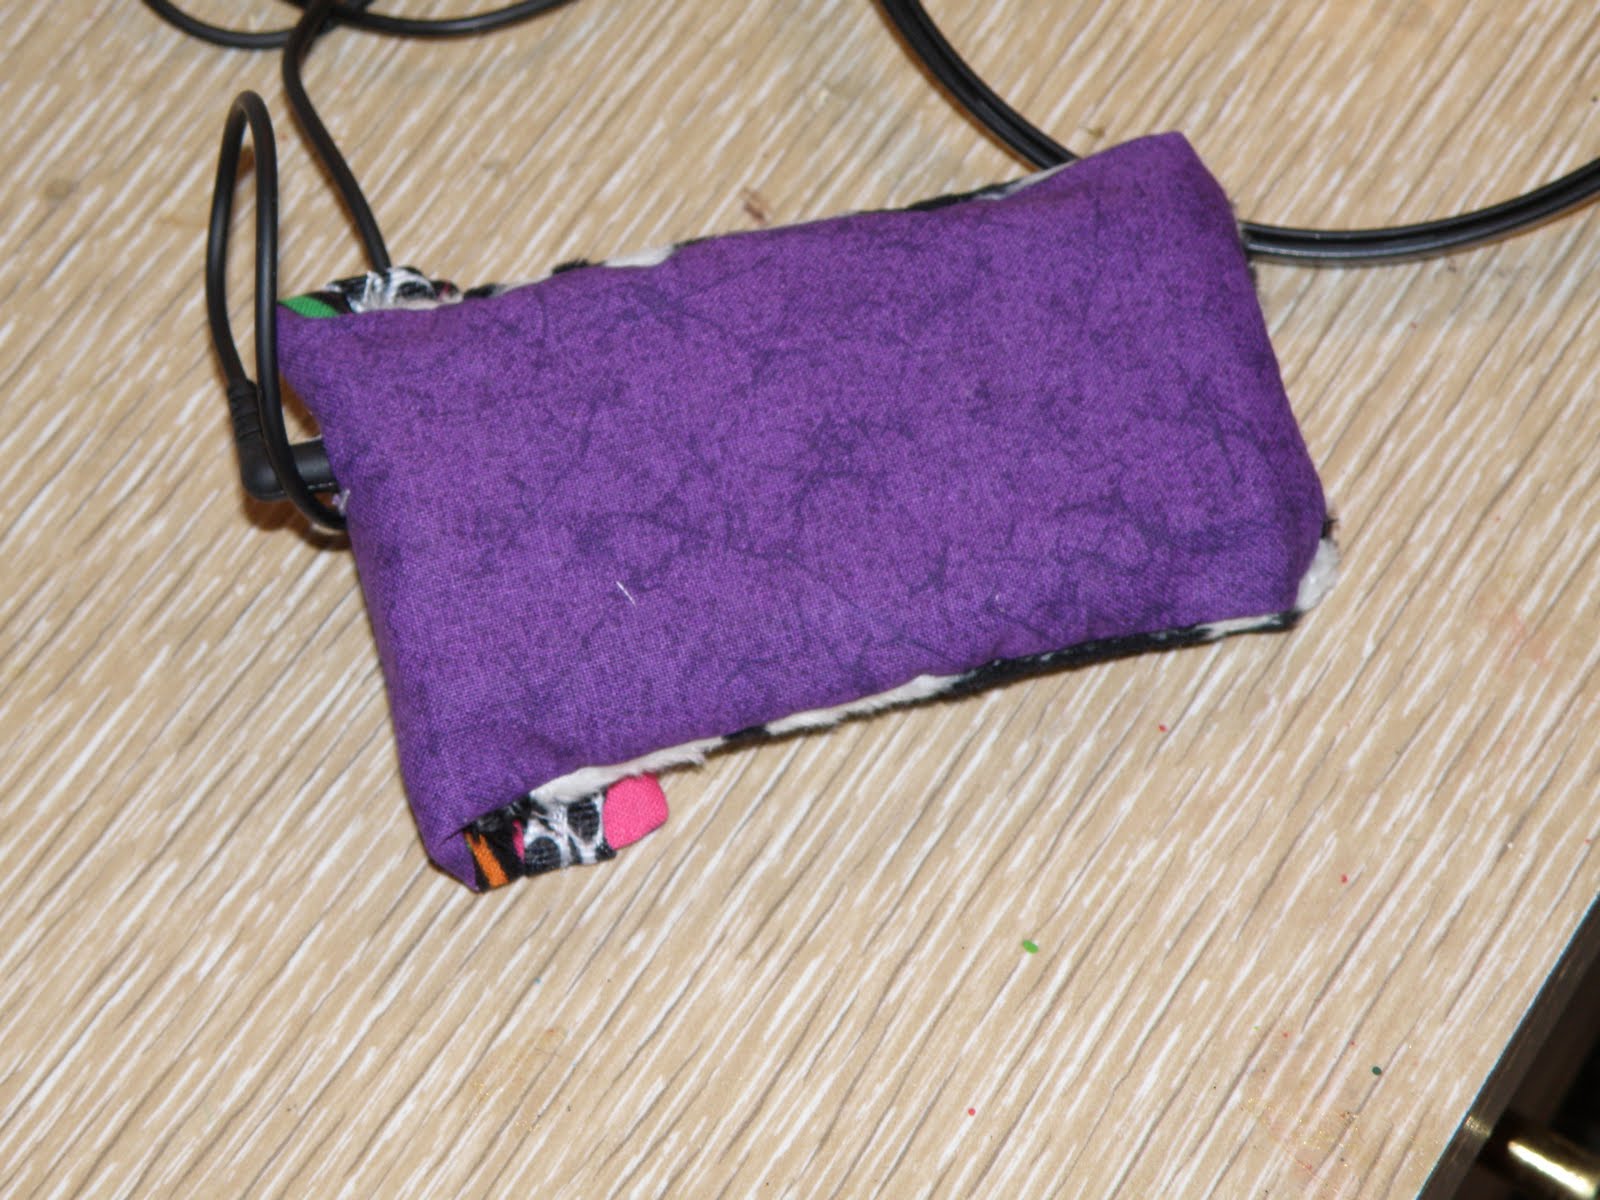
- Measure the player on a piece of fabric, and cut the fabric about 1/2 inch wider on three sides, and about 2 inches longer on the top side. Repeat an identical size with another piece. Repeat this with a third section of fabric, but measure it just 1/2 inch wider on the top this time.
- Stitch the two identically sized pieces of fabric together on three sides, with the face of the fabric facing inward. Once it's sewn on three sides, clip the corners, then turn it right side out, and use a pencil to poke the corners out.
- On the remaining section of cut fabric, sew a hem across the top side, just a thin hem.
- Choose which side of the double sided length of fabric you want to be the outer shell. Pin this side to the smaller section, face to face, with the unsewn edges together at the bottom. This section will not match in length- that's fine!
- Sew the two sections together on the sides and across the bottom, then trim the edges, and turn it right side out, once more using a pencil to poke the corners out.
- Now that it forms a pocket, slip your MP3 player in, and make sure it fits (psst... my first try didn't fit, oops!). Keep it in, and measure where the long section lands when you fold it over the MP3 player. Mark the spot.
- Hand stitch your button onto the shorter section of the fabric below where you marked where the flap landed. You'll be using elastic to secure the top flap to the bottom section, and you want it nice and tight.
- Using the elastic, measure how much is needed to fit over the button from the flap, while remaining nice and taut. Sew the loop of elastic to the underside of the top flap.
- Now comes the tricky part. put the MP3 player back in, and mark on the outside of the fabric where the headphone cable goes. For mine, I opt to put the MP3 player in upside down, so that the headphone cord comes out on the top flap. It was easier to create the hole there. NOTE: If you have a hole in a different location, such as the side, you may want to do this step before sewing the pouch together!! Once the location is marked, sew a box around it, then use scissors or a seam ripper to cut the fabric out from inside the box, clipping all the loose threads. You could also use a button hole stitch, if you know how to make one!
- Lastly, because I used white thread, I sewed a coordinating length of ribbon to the flap to hide all the hideous stitching I had done!


And, when you are done using it, wrap your headphones cord around it, then button the flap so the cord stays wrapped around it, and they don't get tangled or lost!
7 comments:
Great idea! I need to make something like this for my ipod. I'm getting addicted to all kinds of fun podcasts and I like to listen while I'm doing housework or out in the garden. Thanks for the tutorial and thanks so much for linking up to Finished for Friday! Have a great weekend.
Hello from the Philippines!! I just wandered into your blog and wanted to tell you I was quite amused and interested in all you have going on! This project is great- I have all these scrap cloth from visiting vintage shops (here it is called ukay-ukay) and i think I'll like making these in different sizes! And definitely we in the Phil. don't have Martha Stewart budgets! Patsy from
HeARTworks
Sweet & I also love your shirt sleeve re-model!
Love this... I couldn't live without my iPod as I'm training for a 5K.
Great job! And cute fabric! :)
Very nice! You can get one of those elastic arm or knee supports from DT to add to the back of it, then you could wear it around your arm while you are walking too.
PS Aren't ear buds the worst? What size ears do these people think we have?!?!
Thanks for linking up to the Mad Skills party!
great idea with the button and loop to keep the cord from untangling.
Post a Comment