
Here is a simple guide to making woven heart hair clippies for your little darling.
You'll Need:
3/8th's width ribbon- any color, or style you want, though Grosgrain works best.
1 alligator clip, snap clip, barrette, or headband
Scissors
Hot Glue
- Cut your ribbon to the length you want- I just kind of wing it, but it usually comes out around 4" in length.
- Cut this ribbon in half, leaving two equal lengths.
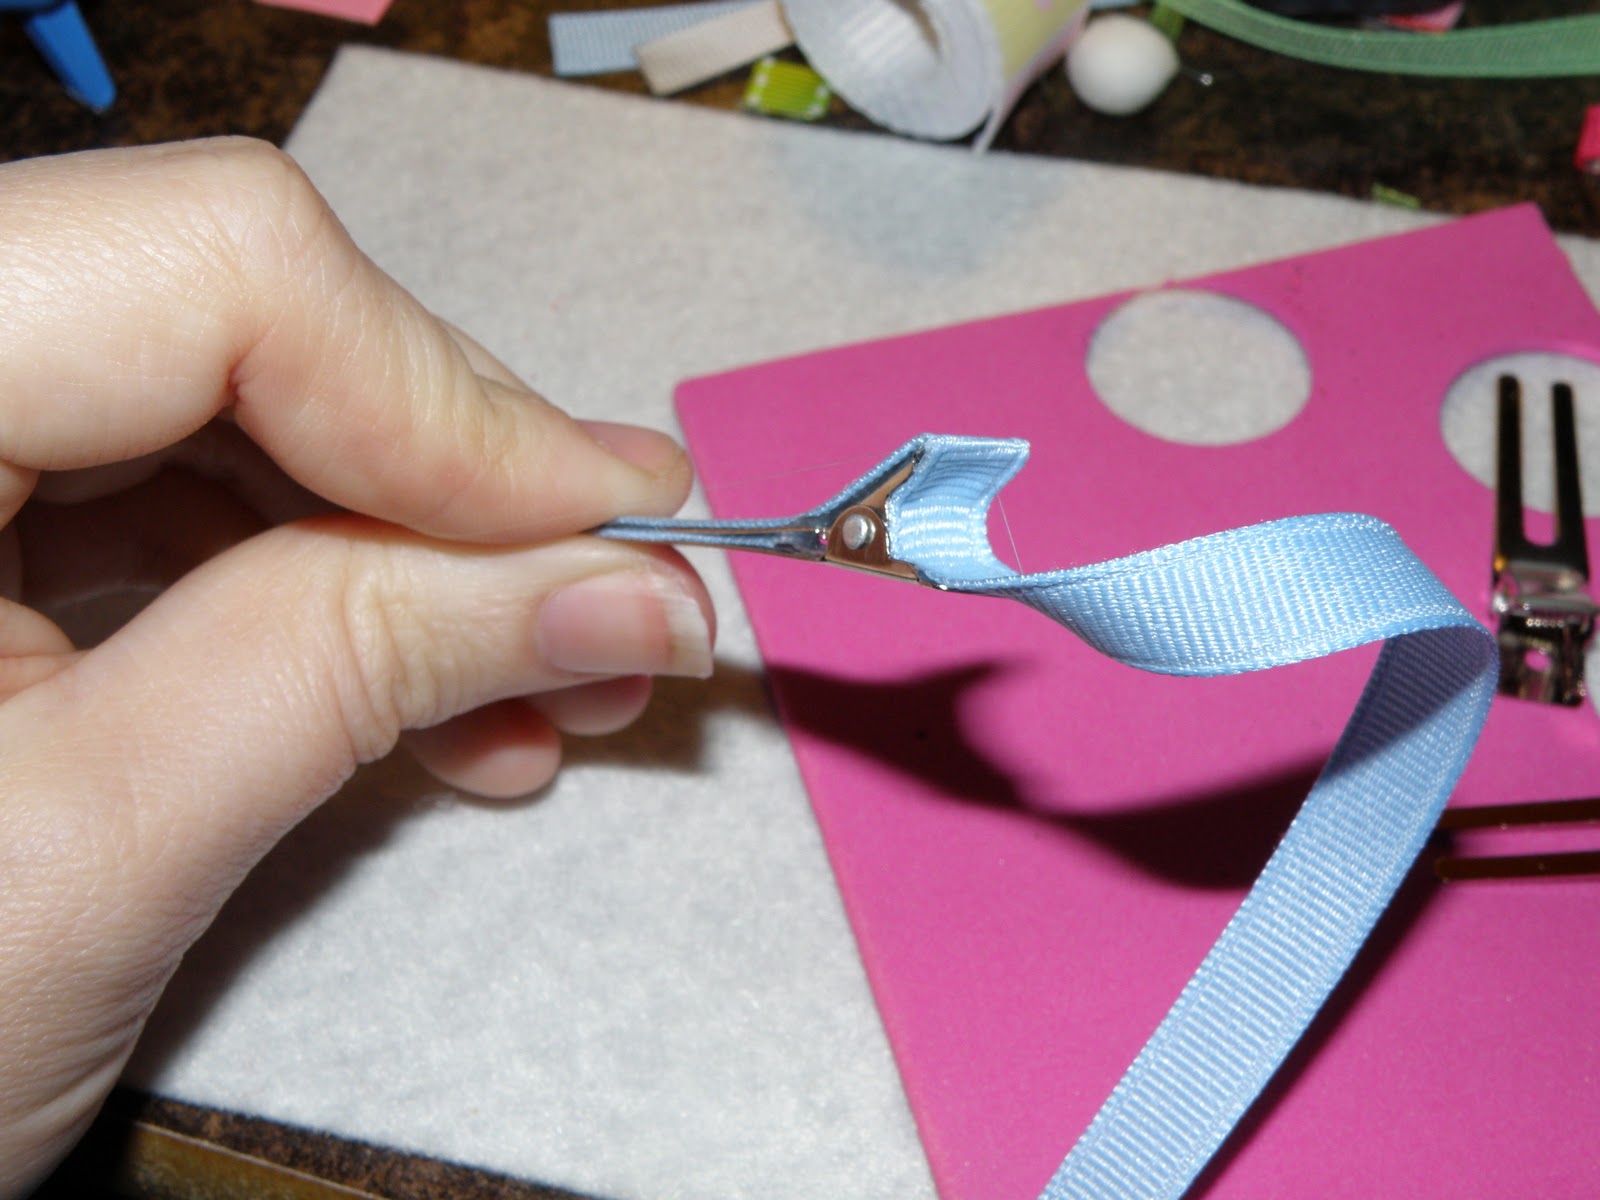
- Seal the ends with your desired method. I use a lighter to melt my ribbon ends, but fray check will work as well.
- Glue the two pieces of ribbon together by the ends, so they form an L shape.
- From here, lay the ribbon down, and take the piece that is glued to the back, and fold it so the end is laying on the front side of the ribbon, but right next to where the ribbon is glued on the backside. Glue it down.
- This should give you a sort of a lower case b shape. Take the other ribbon end, which should be the only un-glued end at this point, and fold it backwards. You'll need to weave it through the ribbon, so that the end is against the back side of the ribbon. The weaves should be woven opposite of what is there. Glue the end to the backside. You should have a heart now with a woven center.
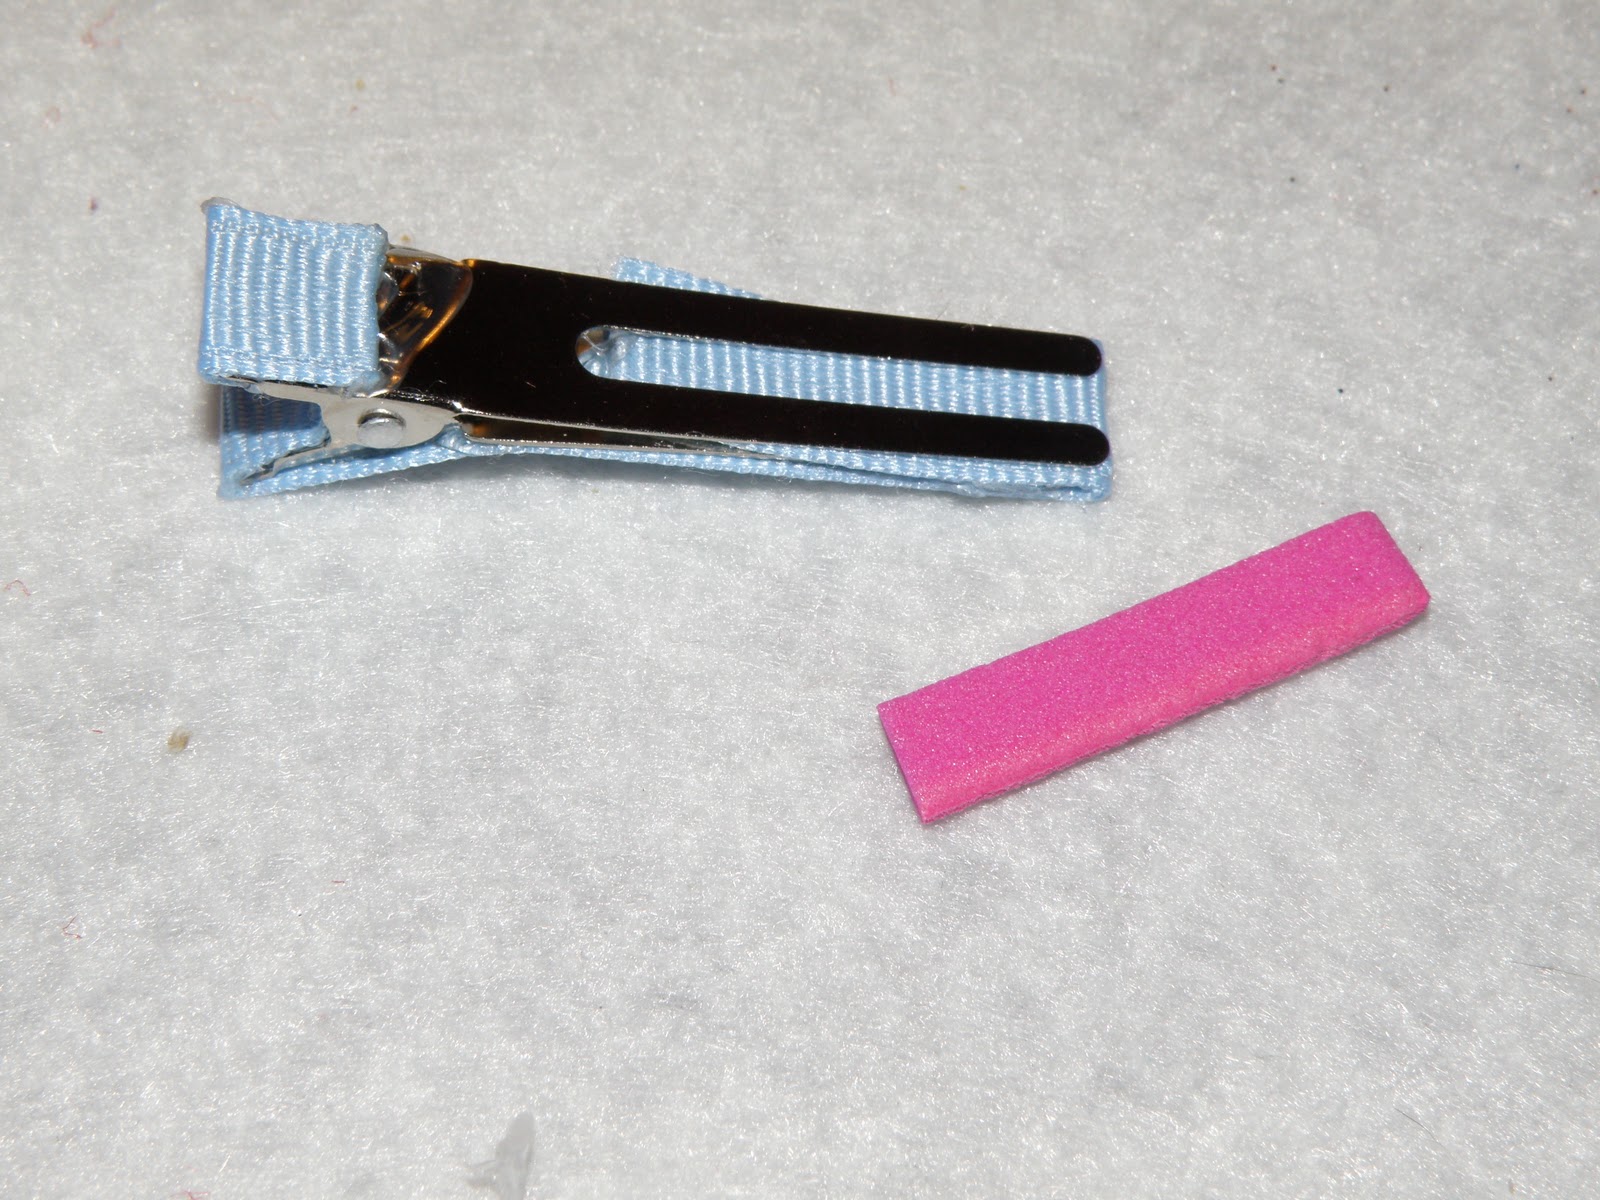
- Add glue to the top of your pre-lined alligator clip, and attach it it. You can add gemstones, sequins, or even glitter glue to make it sparkle.
You can use a single color, or two colors of ribbon. Patterns are all right, but it should be two sided, as the single side ribbon will be flipped to show the unprinted side as well.
Below are photos step by step, including showing you how to line an alligator clip, and how to use crafting foam to make a No-Slip-Grip for your hair clip.


10 comments:
So very cute! My little girls would love clips like this! Thanks for sharing the great tutorial!
-Sarah
http://sarahndipities.blogspot.com
These are so cute. You really have a crafty talent.
JR
Frugality Is Free
Very cute!!! I know a girl that would love to wear these. Great tutorial and photos :D
Oh, wow, thank you for the tutorial!! I'm going to be posting your blog's button on my blog because I just found it and I LOVE it! Thank you!!
What cute little hearts and flowers! :D
You lost me there though where you combined the 2 hearts...or something...? Hehe.
:)
Super cute!!! Can't wait to try these. Thanks for sharing!
missy
ificould-ificould.blogspot.com
Great Tutorial! Thanks for sharing!
We linked to your post. :)
How do u do the woven of the two hearts
I did it, super easy and beautiful, thank you!!!
Ana
Thank you so much! This makes an adorable decoration for the front of the doll's t-shirt I am making.
Post a Comment