Showing posts with label apron craft. Show all posts

Wednesday, December 16, 2009

Dish Towel Apron

BCD Show and tellgiveaways


Last week I started a project for Gillian- a kitchen apron. A month or two ago, I talked with someone online about ordering an apron to be made for Gillian. We talked fabric, and size, but I never heard back. Being the holiday season, I figured it's already a busy time for us crafters, so I didn't push it.


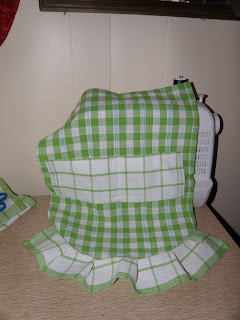
But, I still wanted to get her an apron of some sort, and decided- hey, I can make one! So, that's what I did. I've posted in the past about making an apron for kids from a dishtowel and a pot holder. I wanted a different style for Gillian, though, so I made it from 2 dishtowels, instead.


I kind of followed this pattern, and kind of just winged it as I went. I had previously made an apron identical to the first link to give to my mom, who was wanting an apron. It was much too big for an almost-8-year-old, though, so I modified the pattern.


I opted not to use a second towel as a wrap around section. Instead, I cut from it a pocket section, and a ruffle for the bottom. When I went to attach the ruffle, I opted to round the bottom of the apron. I did a pocket seam across the top, as in the pattern, but then I decided to use fabric for the neck, instead of ribbon. To keep it gathered looking, I sewed a strip of elastic from one end to the next.

My stitching at that point is sloppy, and there is simply no excuse for it. I should have considered that, and sewed it on the seams, or used a less noticeable color of thread. Sloppy, like I said.


For the back ties, I just added thin grosgrain ribbon. I rather like it- and I rather love the fancy stitches I was able to add, thanks to the sewing machine. I added a stitch above the pleated ruffle, because the ruffle wasn't laying flat. I love the decorative stitch, though!


Saturday, October 31, 2009

Inexpensive Child's Apron

With Thanksgiving & Christmas coming up, the chance to have the kids in the kitchen is expanding. Recently, I talked with a friend online about making an apron for my youngest daughter for Christmas. She is getting an easy bake oven for Christmas that another friend had sitting in her closet- brand new!

I am having one made for her, but after that, I found a really easy way to make a child's apron to use while baking. The main supplies- the towel & pot holder, can be found at Dollar Tree. For $3, you can buy 2 towels, and 1 2 pack of pot holders. Counting in the ribbon, this project should cost you about $1.75 to make.

Finished images of this project can be found on the blog by clicking the link below- it opens in a new window

Child's Kitchen Apron

What You'll Need:
1 Kitchen Towel
1 Rectangular Pot Holder
1 Spool of Ribbon
Sewing Machine or needle
Thread

  1. Clip the loop off the pot holder, if there is one.
  2. Take into account the child's height, then decide whether you want the towel to hang length wise, or sideways, depending on how tall or short the child is. Once you have decided, sew the pot holder onto the top edge, in the middle. The ends do not have to be bunched or gathered, they remain flat.
  3. Once you have the pot holder sewn on, cut a length of ribbon long enough to loop over the child's head, or create two lengths that can be tied around the neck. Sew the two ends to the upper corners of the pot holder.
  4. Sew two lengths of ribbon to the top corners of the towel, to tie around the child's waist. If you choose to make a sideways apron, you may want to fold the top corners down, and stitch the corner down before sewing ribbons on, to make it shorter around the waist. With smaller children, the apron might be too wide to tie around the waist at full length.
  5. To keep the ribbon from fraying, you can coat the ends in clear nail polish, or fold it over and sew the ends.
The image below shows how to place the potholder, and where the ribbons go. I didn't have anything on hand to demonstrate it, so I used my art program. Yes, I really should have been a serious artist, I'm just that good. ;)