Showing posts with label frugal decorating. Show all posts

Monday, March 22, 2010

Talented Tuesday

Interested in sponsoring next week's Talented Tuesday post with your own crafts, shop items, or a tutorial? Contact me for details at herberkids3(at)yahoo(dot)com!

Welcome to another edition of Talented Tuesday. For today's post, I am showing off a wall hanging I did for my Mom's bathroom, as a follow up to the wall hanging set I helped her make for her kitchen. If you haven't seen it yet, check it out!

For this set, I had a concrete idea in mind. My mom recently repainted her bathroom from yellow to a pale lime green, with white wainscotting. She changed out her shower curtain from yellow flowers to green, blue, brown, and white stripes. Now, we just need to add a few things to the room!

Over the weekend, we picked up lots of supplies for the main project, including paint we never even opened, too much scrapbook paper, and a couple extra canvases, for a "Just In Case" moment. We wound up not needing those.

Star Wall Hanging

You'll Need:
Dollar Tree Pre-Printed Canvas
Paint
Mod Podge
Scrapbook Paper
3-D Paper Mache Barn Star
Hot Glue


  1. Paint the edges and part of the top of each canvas in the color of your choosing. I used Moss Green. I painted about 1 1/2" in on the tops. Let it dry, then add another coat if needed. My white bird picture needed 2 coats, and the brown lily picture needed 3 to cover the darker colors.
  2. Paint your stars the color of your choice while the pictures dry. I used 2 coats of Moss Green, but one would have been enough.
  3. Using a wet paintbrush, add a darker color paint to the stars, especially in the edges. I used plain old Brown, very watered down. Once it's coated, wipe it off with a damp paper towel. Repeat until you've achieved a good distressed look. I also used a brown pad of Distress Ink to just lightly ghost over the top ridges of the stars, so the brown was a bit darker in spots.
  4. Measure out two squares of scrapbook paper. I had a lot, but ended up deciding to use the same paper for both. Cut it just a bit larger than you want, then tear the edges for a more ragged, rustic look.
  5. If you want, you can distress those edges with ink. I used Vintage Photo Distress Ink to do this, and very lightly distressed the paper itself.
  6. Apply a thin coat of Mod Podge to the picture, and press your paper on, smoothing out the wrinkles as you go. Apply another thin coat, coating the entire front and sides of the picture. I chose Glossy for this project.
  7. Hot glue the star onto the front of the picture, and Viola! You're done!


Notes-
It only took me about 15 minutes to do this, NOT counting the time I was waiting for the paint to dry. It might be easier to paint it, and go about doing something else, then going back to it. If you try to paint over it before it's fully dry, it wipes the paint off due to the plastic like feeling from the pictures.

Like my last project, this project is fully customizable to any decor with the multitude of paints and scrapbook paper available.

Total Costs:
DT Canvas- $1/each, $2 total
Scrapbook Paper- $.59, half used, $.30 total
Barn Stars- $.50/each, $1 total (actually, I think I got them cheaper, back at Christmas, but I can't recall. They've just been sitting here ever since)
Paint- $.50 (while this WAS on hand, it was a brand new bottle, so I'll count the cost. We got it 2/$1 at Michael's this past weekend).

End Cost: $3.80, or $1.90 each.


The Rules


1) Post a blog about something you've made- a refurnish, recipes, a craft project, a sewing project, room decoration, anything you've done!

2) Add a link to your blog post- not to the blog itself, but to the individual posts! You can post more than one project, just add more links! The links should look something like:

http://theherberfamily.blogspot.com/2010/01/love-banner.html

and NOT like this:

http://theherberfamily.blogspot.com/

3) Add the code below to each post you link to the MckLinky, so that others can post their projects here as well! The list will accept new links through Saturday, so if you make something new, come back and post it! Don't forget to look at the links on the list, and let people know where you found their post at!

This MckLinky will remain open and accepting links through Thursday evening!! 


Photobucket


Saturday, February 27, 2010

Glassware for Easter

Earlier this week, I made a new glass pedestal vase to mimic a Pottery Barn look. After I was done, I took some time to decorate the other pedestal vases I had for Easter as well. All of these vases were made using items picked up at either Goodwill or Dollar Tree. I always look at Goodwill first, because the glassware is cheaper. But, if I can't find what I need, I go to Dollar Tree.

To make one like this, find a candle stick of some sort, and a vase or candle holder you like. I use E6000 to glue the stick to the bottom of the vase or candle holder, then let it sit over night to dry. It's nice and sturdy!

 
For the tallest one, I picked up a prayer candle at Dollar Tree (which are hard to find- DT doesn't get them in often, and when they do, they go quick!), and glued it into the vase. This leaves space between the candle and the vase to add decorative touches for each season or holiday.
I added moss to all of them, and added more to my Pottery Barn knock off to fill it up higher. I then took a branch of narcissus flowers I had gotten at Dollar Tree, and plucked some flowers off, to put into the vases. 

For the Pottery Barn look alike, I kept two of my speckled eggs in there, and added a narcissus and a flower bud. I put the third egg in the smaller one, again with a narcissus and a  bud.


For my 4th jar, I went more traditional with bright spring colors. This jar is likely an old filled candle, with a lid, though it was empty when I found it at Goodwill. 


I re-used the same fluff I used for a Valentine's Day candle, added 3 unpainted plastic eggs, then used some cloth ribbon I found at Goodwill to tie a bow around it. It didn't quite look finished, so I glued a button to the middle.
All of these vases and the jar are able to be redecorated for any holiday with ease, and were quite cheap to put together. On the basic glassware itself, I haven't spent more than $6 on all the parts and pieces.

Never forget- while the Dollar Tree is cheap, you might find exactly what you need (or exactly what you never knew you wanted!) at thrift stores even cheaper! Decorating for the holiday does not have to cost money, and you don't need the same knick knack, plastic, light up stuff that everyone has.

Thursday, February 25, 2010

Pottery Barn Easter For Less

Jess over at Mad in Crafts is a Pottery Barn for Pennies guro. Seriously, she should be hired by PB. Anyway, I saw some of her stuff, and started to peruse the catalog a bit more. Now, I'm not really a PB kind of girl, for the most part. It's just not my overall style. However, every now and then, something cute sticks out.

One of the projects Jess made for her "Dollar Barn Easter" collection was the splattered eggs, similar to the ones shown below (which sell 12 for $14, AND are not shipping until the end of April- you know, AFTER Easter).


I found the perfect vase at my Goodwill AS-IS center, which clearances out items that don't sell in the regular Goodwill's.  Here's my end version:


So, how much did I spend?


3 Eggs: $.09 total ($.67 for 2 dozen at Hobby Lobby, regular price)
Vase: $.29 (Originally $2.17 at Wal-Mart, priced $.99 at Goodwill, marked down to $.29 on "clearance")
Candle Stick: $.29 (Heavy, wrought iron- marked $.99 at Goodwill, marked down to $.29 on "clearance")
Moss: $.10 (A bag from Dollar Tree, but I used barely any- the bag still looks full)

So, for $0.77, I was able to recreate the full Pottery Barn look, and I love it! The Hurricane vase shown on the PB website runs $29-$59, depending on size. The filler is another $14. I'll count myself lucky to have escaped with a very similar look for under $1!

Here is the before of the candle stick. It was spotted with rust, and had a tacky gold paint job. I didn't achieve exactly what I was hoping for, but I prefer my own paint job to the one it came with.


For the eggs, I sponge painted them cream first, letting the colors show through in some spots. I then splatter painted them with a mix using burgundy, golden yellow, and a touch of black to get a brownish shade. 


This post is linked up at the link parties listed here.

Tuesday, January 26, 2010

Frugal Decor

Last week, I made my first trip to Goodwill in several weeks. I'm able to drive for short distances again, so that makes it much easier to get around! While I was in there, I found some "trash" that I wanted to turn into "treasure" with paint, scrapbook paper, and mod podge.

Here's the first finished item- a wall hanging. I haven't decided if it will be for my dining room or my bedroom, since both rooms are done (or will be) in the same shades.


Cost Breakdown-

Picture- $.99 at Goodwill
Scrapbook Paper- $.20 on sale at Michaels
Spray Paint- $3.29 for a can, which lasted through 5 projects today, with about half a can left, so... I'm going to say maybe $.85 worth of spray paint
Acrylic Paint- On Hand
Mod Podge- On Hand
Letter "H"- $1.50 on sale at Hob Lob
Hot Glue- On Hand

First, I taped part of the frame work off. The picture is all in one- it looks like a frame, but it's all just 1 piece. I liked the crackle paint, so I wanted some of that to remain, and thus, taped it off. I then sanded the surface down so the paint would adhere better.


I spray painted the very edges and the main picture surface, which I forgot to take a photo of. The design underneath showed through still, but that was all right. It looked nice on the crackle area, too.

After it was painted, I removed the paint tape, and dry brushed black acrylic paint onto the surface where I hadn't painted. I had forgotten to sand this part down, though, so the paint didn't stick real well. I wound up wiping most of it off to give it a more glazed like effect.


I also wound up adding some around the edges that were painted red, which gave it a nice effect.

While this dried, I sprayed the letter H red. While that dried, I cut out the black scrapbook paper I had chosen, and mod podged it to the surface of the picture.


Once the letter was dry, I dry brushed black paint on the surface, again wiping it off for a glazed effect. Once all of this was dry, I glued the letter to the surface. I love it!


It's a large piece, standing probably 16x20, and it cost me $4 to create! This will be the large center piece to whatever wall it goes on, with a pair of candle holders I also painted today going on either side of it. I can't wait to redecorate the rooms so I can add these to one of them!

From Trash To Treasure:


This post is linked up at the link parties listed here.

Don't forget, today is Tuesday, so link up with my Talented Tuesday Link Party!!

Sunday, January 3, 2010

Furniture Refinishing

This year, I have a lofty goal, as I described in an earlier post. I want to learn how to refinish furniture. There are so many helpful blogs out there that show how to refinish furniture, and it's given me hope that I, too, can someday do this.

This sofa table is just about the most awesome refinish I've seen yet. I'm not a turquoise furniture kinda girl, but I just LOVE this!

From This:


 {photo credit: Brooke@ All Things Thrifty}

to this:


Isn't that just fabulous? I love how she stained it with black to make the details really pop out.  Brooke & Kallie at All Things Thrifty have such wonderful projects, and fantastic tutorials, as well as selling some of their pieces. Check it out if you haven't!

Gwen is someone I've "known" online for a few years. We first met at Gather, and she's just a wonderful person! She's also a very thrifty decorator and refinisher, taking pieces found at yard sales & thrift shops, and even roadside treasures, and turning them into gems for her home.

She took this:


{photo credit: Gwen@ Murphy Grace Home}

And turned it into this:


{photo credit: Gwen@ Murphy Grace Home}

So, my main project ideas to start off with will be simple. I have 2 bookshelves that are real wood, real sturdy, and real ugly. They are just stained, so the wood collects dust like nobodies business. And you can't dust them, because the roughened texture of the wood. It just traps it there. I want to sand them both down, fix up the one quite a bit first, pain them, and seal them so they have a nice glossy finish.

With the one book shelf, I also want to add hinges to the top, and attach a bulletin board. That way, it's hanging, it can hide some of the storage mess behind it, and be out of the way. That will then become major storage for my craft area. The other one will become book movie storage, and swap places with the one I want on my side.

One other project I'm contemplating... well, two really. I have a dining room table I love. It's huge. It has self-storing leaves, which makes it heavy, heavy, heavy. It's a honey color, and blends in with my dining room, which has faux wooden floors (they came with the house, and I hate them in that room), and tan walls. Blah. Yes, that whole room is blah, and yet, when we moved in, I loved it.


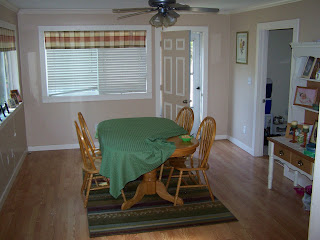
This is how it is now, except the rug is under the table. The room is HUGE, which is part of the problem.


This is how we had the room when we first moved in. However, once winter hit last year, we realized that having the table right there made more of a mess of everything when we walked into the house. We do not use the door you see open. The door we use is immediatly to the left of the photo.


A blah, beige room, taken before moving in. The door you see to the right is the back room, which we use for storage. The room I was standing in is the nook, which we use for the kids computer, and a fish tank.


This is the opposite corner, by the other back door. The step-up area is the nook, and that's the outside door we use to enter and exit the house. I wish the door were hung the opposite way, so it opens to the left instead of the right.


Here is the western wall of the dining room. The left door is the main bathroom, the right door is the back storage room.


These built in shelves are right next to the nook.


This sits against the wall in between the bathroom and back room.

All in all, I hate the dining room. Given the size, I almost wish it were our living room. However, the actual living room is also too large for a dining room, and is carpeted, which I hate for dining rooms. The kitchen, while being an "eat in" kitchen, is likely too small for the dining room table, unless we keep it at it's smallest at all times.

Anyway, here's my ideas. I want to paint, first of all. I'm thinking a deeper tan color with red undertones, a rich earthy color. The trim work would be... well, I'm not sure. Probably a pale cream color, not flat out white. Next, I want a black dining room table set. Chairs and table both, all black and glossy. I would add curtains that are black at the top foot or so, and khaki from there all the way to the ground. We have two extremely large windows back there, which are currently open to the public, because the blinds were broken, and we finally removed them a few weeks ago.

The hutch I have, I want to keep. I want to paint it a deep red color with some black staining, I think. My only problem? It has a tile top. Can that even be painted? I have no idea. They are white, but grubby looking with some small cracks that have collected dirt over the years that can't be scrubbed away. I think if I can paint the tile, I would make it black to tie in the deep red with the black staining.

I also want to make a bench for the room, for the kids to use when putting on or taking off shoes, and to store shoes under.


{Photo credit: All Things Thrifty}

This bench was made from a sofa table chopped down over at All Things Thrifty. I think I can find a coffee table at Goodwill that will work for this, though, since sofa tables are harder to come by. That, and I don't have a saw or access to one to cut the legs down.

I would put the bench tight against the step into the nook, since it's a wide open wall, and there's a good 3 feet between that wall and where the door is. Plenty of room for the bench, and room for the door to open up just fine.

I'm half tempted to do the dining room before the bedroom, but since the table needs to be refinished, and the hutch, it feels like that room would be a LOT more work, you know? At least, for my first big project. But, on the other hand, it would be FAR easier to get started, since I could do the painting of the room itself with little or no moving items around, and at get the curtains up, then work on items for the walls before it warms up enough to take furniture outside to sand and paint.

Anyway, goals, goals, it's all just goals. Let's hope I actually get it done. ;)


Monday, November 16, 2009

Christmas Trees

This year, I'm going a bit crazy. I have 4 Christmas trees to put up. Yes, you read that correctly, 4! Ok, let's be more realistic. 2 are only 3 feet tall, and pre-lit with fiber optics. They don't exactly "count" as far as work involved.


But the other two are both full size trees. I have had the first one for 3 years now, this year. It's a 6 foot tall white tree, pre-lit with clear bulbs. You should know that when it comes to Christmas, the more color, the better. I adore brightly colored lights, bulbs, ribbons, bows, and ornaments on my tree.


My mother was of the mindset that a tree should look uniform, classy, and traditional. Little red bows, clear lights. I can appreciate the simplicity of it, I really can. Just not in my house!

While the white tree with white lights might seem to clash with my need for color, really it doesn't. The first year, we added strands of red lights, and decorated it in only red, white, or silver ornaments. It was our Candy Cane tree. If you turned the clear lights off, it glowed like cinnamon hard candy. I loved it!


Last year, we added multicolored lights. I hated the tree lit just by the colored lights. It went all dim and dark, and the colors just didn't pop like they did if the clear lights were on it. The hues took on a more vibrant shade, with the green looking turquoise, and the reds looking like pink. LOVED it! We put all the ornaments on last year, or rather, about half, I suppose.

After Christmas last year, I had a gift card, and I knew what I wanted. I knew I wanted a traditional tree again. A green tree. A tall, full, green tree. I wanted it cheap, but not cheap looking.


I found a gorgeous 7 1/2 foot tall, full tree, half off the day after Christmas last year. It was the last pre-lit tree with multi colored lights, too! So this year, two big trees. I have a large dining room, which is almost too big to be a dining room if you ask me. We have a table that, when fully extended, seats 8, and there is a lot of empty space around it.


The white tree will go in the dining room this year, in the corner, since there are windows leading right up to the corner on both sides.


The green tree will go in the living room, the center piece of the holiday decorations. I've already told the kids they get to decorate that tree. The white tree is all mine. Here are photos of my white tree from the past two years... enjoy!


Our 2007 Christmas Tree


This is what our tree looked like with just the red lights on, when I used the flash on the camera. Kind of gave it a warm pink glow all over.


This was what the tree looked like with the clear lights off, and no flash on the camera- all warm & cinnamony!


Well, obviously this isn't of my tree, but wasn't Gillian just so darn cute?


My 2008 Christmas Tree


Friday, October 30, 2009

Decorating For Christmas- On a Budget!

Decorating for Christmas- on a budget!

I loved being at my Grandma's house all year around, but even more so at Christmas. She collected Snowmen. Grandma had more snowmen than we were able to count. To put it into perspective, no single ornament on her tree was anything but snowmen. She had a wall made into shelves, 8 feet tall, and probably 15 feet long, every shelf filled to the brim with snowmen. Her tables, wall shelves, even the bathroom, were all filled with snowmen.

But that sort of decorating takes years to accomplish. She got her snowmen mostly from gifts at Christmas, though she was also known to pick one or two up here and there.

So, how do you decorate your house frugally, but make it look nice? Well, forget the paper chains, fake snow, and window clings, here are some idea's that go above and beyond. While there is a definite place for the above mentioned items, not everyone is into preschool-chic decorating. ;)

Frugal Decorating

What You'll Need:

Pillar Candles in Holiday Colors*
Beaded Garland*
Wide Holiday Print Fabric Ribbon*
1-3 Packages Glass or Plastic Bulb Ornaments (if you have young children, or adventurous pets, I recommend using shatter proof, or plastic bulbs for this)
1/2 Yard Holiday Printed or Solid Colored Fabric
1-2 Roll Wrapping Paper in a Color or Pattern of your choice*
Wide Gift Wrap Ribbon*
1 Strand 35 count lights- multicolored or solid**
1 Bag Potpourri*
Suction Cup Hooks for Windows*

I have all the items listed as items to buy, but you should first raid your home to see what all you might already have on hand to use! Quite a bit of the items can be found at Dollar Tree for less than you would pay at a department store, such as Target or Walmart.

The items with a * beside them indicates items you can most likely find at the dollar store. Please note that while Dollar Tree does carry strands of lights now, I would not use them in the manner in which they are needed. I bought some one year, and used them in a potpourri jar, and the wires melted together, and almost caused a fire. Now, I skip Dollar Tree lights!

You might want to decide on a color theme before buying, so that you can stick to a general idea when picking up any items you may need to purchase. You can use any theme you want- jewel tones, traditional red & green, silver & gold, or pick a singular solid color for most of the items. The only limit is your imagination!

What you'll want from home:

1 large jar, like a mason jar, or a large, clear vase (make sure it has a wide neck, not a skinny one!)
1 large serving bowl
1 small "salad" or "dessert" plate for each candle bought (these can be covered if they are not "matching")
Hot glue gun & got glue

Here are the ways these few items can really make a nicely decorated home for your holidays. Many of these ideas would look nice in an office setting as well!

Potpourri Light Jar

  • First things first, put the strand of lights into the jar or vase, leaving the plug out. Tape the wire on the outside of the jar so that it lays flat against the jar, but leave enough slack to plug it in.
  • Fill the jar with the potpourri, and plug it in. These jars are perfectly safe, and they will heat the potpourri up enough to give off scent. They work great in bathrooms as a night light, and to scent the air.
Christmas Bulb Centerpiece
  • Next, lay some fabric in the bowl so it hangs over the edges, if you think it needs to be covered. If not, just skip the fabric and move on to arranging bulbs in it in different sizes, but you probably won't use all of them.
  • Drape the beaded garland in the bowl, and on top of the bulbs. The colors can all be the same, or you can mix it up for contrast. This makes a great table centerpiece. If you didn't need to use the fabric inside, then put it under the bowl when you place it on the table.
Candle Plates
  • For the next one, arrange the candle pillars on plates with 1 or 2 of the smaller sized bulbs on the plate. If you have beaded garland left, put that around it, too.
  • Take the ribbon, and cut it so that you have just enough to wrap around the candle. Hot glue it to the candle in the back.
  • Set these out on tables around the living room for a festive touch. If the plates need to be covered, use the fabric that's left over, cutting it into squares that fit on the inside of it, or drape over the edges.
Wrapped Wall Hangings
  • Find any pictures or mirrors that are hanging on the walls, and take them down. Wrap them up with the nice wrapping paper, tie with the ribbon, and add a bow, then hang it back up.
Window Ornaments
  • Last, take any left over ornaments and any left over ribbon, and tie small bows to hot glue to the top of the ornament, just below the hanger. You can use thread or fish string to hang them in windows from the suction cups. Please note, cats will bat at these, you may want the "shatterproof" plastic bulbs if you do this one.

Viola- a frugally decorated house with out a paper chain, snowflake, or window cling in site.

Ways to add more to the decoration for a few dollars more:

You can add to the elegance by weaving a strand of battery operated lights in the bulb center piece to light it up some.

Add battery or cord powered "candle" lights to the windows under the hanging bulbs to reflect some light off of them.

Buy more fabric ribbon to use on the picture presents in place of cheap ribbon.

Get a pretty table runner at the dollar store to put on the kitchen table under the ornament centerpiece.

Buy a set of taper candles and sturdy heavy (but short!) taper holders (I've found heavy glass ones at the dollar store), and put those into the bowl before adding the bulbs & garland for a candle centerpiece.

Buy a bag of jingle bells for about $1-$2 at the store, and add a few to each of the different candle plates, the ornament bowl, and even mixed in with the potpourri jar. Glue one to the center of each bow on the hanging ornaments as well.

I hope these idea's help some people with new decorating ideas!