Showing posts with label frugal crafts. Show all posts

Monday, March 22, 2010

Craft Hacking Grandin Road

It all started with a message on Facebook from my mom. She found some wall art she really liked, but the price was just insane. She asked me to wrap my head around it, and see what we could do to recreate it.

It was very clear to me that we could indeed do it for much cheaper than Grandin Road wanted for it.

Here's a photo of the original art work she loved.


It's 3 canvases across, and 4 canvases down, for 12 total canvases. In this instance, it resembles a telephone pad. The canvases are sold separately, at a cost of $119 each for 16x16, and $159 each for 24x24.  To buy 1 each of the 16x16 canvases, you are looking at spending $1,428. Want to splurge on the larger size? $1908 in all.

Well, it was a no brainer to me. Obviously we could do it a LOT cheaper than that, and fully customize it while we were at it!

This weekend, I drove over to her neck of the woods with my older daughter Raegan, and we got started.

Telephone Pad Wall Art

You'll Need:
  1. 12 Canvases- we went to Dollar Tree and picked up 12 of the bird printed 5x5 wall art picture, which are stretched like a canvas around a wooden frame, but the "canvas" is more of a plasticy feel.
  2. Mod Podge
  3. Scrapbook Paper or Fabric- We used 2-3 patterns for each canvas, but the scraps left over on most of them were large enough for some numbers or contrasting. I would recommend 12 sheets of 12x12, and 4-6 sheets of 12x12 for extra paper
  4. Distress Ink
  5. Stencils or computer print outs of numbers- we used stencils on some, free hand on some, and computer print outs on some
  6. Paint brushes
  7. Buttons- we used these for dots on the number 3 block, but this can easily be skipped.
  8. Scissors
All in all, supply wise, we spent $12 on the canvases, and we spent roughly  $15 on scrapbook paper, with plenty left over. The buttons we found came in 3 packs, but only 1 large one per pack, so we bought 3 packs at $2.99 each. Split that down to what was used, and it was $1 per button- but this could easily be "On Hand" with buttons you have, or circles, or even just using the number 3.

We picked up the stencils for $3.50 after a 40% coupon, and they're totally reusable, so I'm not counting that as a cost necessary to this project. I had Mod Podge, but we also bought some, again with 40% coupons. I had everything else on hand that we needed.

So total costs:

Canvases- $12
Paper- $15
Buttons- $3

For a total of $30 spent, probably less when I subtract papers not used. $2.50 for each of 12 pieces for this large wall art. I -freaking- love it. We "saved" $116.50 on each piece we made, for a total savings of $1398. Almost $1400 saved by "Doing It Yourself!"


And now, for the tutorial.

  1. First, do as I say, not as I did- match each paper up with 1-2 contrasting papers for the numbers or design. Trust me. Once you've matched it, lay it all out in the order you want them in- rearrange so you don't have all orange on top, and all green on the bottom have the colors matched up where you want them. Take a photo, and number the backs of the paper in pencil. Trust me. 
  2. Decide which paper will be the back ground. We decided to crumple some, and leave some flat. The crumpled paper got distressed immediatly. From there, start covering the canvases. You'll want to measure the paper out to about 1/4" wider than the canvas, give or take a bit.
  3. Spread the top of the canvas with Mod Podge (we used Matte, and it turned out great), and smooth the paper on. From there, start folding and Mod Podging it around the edges. Take care to remember where the hanger is on the back, and don't podge over it.
  4. As the canvases dry, distress them to your liking. We used 4 different colors, so some were more brown, some had a touch of black, some red, etc. 
  5. Once all the canvases are papered, it's time to start cutting out your numbers. While we did do the phone pad, we didn't do a number, precisely, on each one. The 4, for instance, spells out FOUR in a square, instead of the number 4. The 5 is hash marks. The 3 resembles a dice with 3 dots. Be creative. Also- this is where you'll notice that while a large chunk of paper A stands out nicely against paper B, when cut to a thin number, it blends RIGHT in. Ugh. This is where chunks of scrap paper came in nicely to form blocks behind some of the numbers. I also took advantage of my distress ink to high light edges, or create square blocks behind numbers.
  6. When you are satisfied, start to podge over the tops, adding the numbers. 
  7. Seal the top with more podge.
  8. Viola! You are done!
All in all, I was surprised at how quickly this project went. We made 12, and granted, there were 2 of us working on it, but the entire project only took about 2 hours from start to finish.  And without further ado, some photos.


A few of the paper covered canvases

Trying to figure out/remember what papers we picked to go with which papers. Oops- this is where my stressing of doing this first came in.

A few finished canvases

This one, we wound up going back and outlining the letters with a cranberry colored marker, because while the print stands out, the letters themselves blend in, and it was very hard to read the letters FOUR. I did not, however, get a photo of it outlined.


(I just LOVE the 2 with the circle around it!)

And finally... The whole thing!


The entire project, put together- isn't it fantastic? The awesome thing about this? Well, aside from being FRUGAL? It's totally customizable when you DIY. Don't like the colors? The fonts? Want letters instead of numbers? Totally doable. It came out great, and we had a lot of fun making it!

I'm hard pressed to pick an all out favorite, because I love the entire project. And I also love that I "saved" us almost $1400 with some ingenuity and craftiness. 

One last comparison:


Once my mom gets it hung, I'll get some photos of it, but I was too anxious to post this wicked awesome project to wait for them!

This post is linked up at the link parties listed here.

Monday, March 1, 2010

Dollar Tree St. Patrick's Day


This past weekend, I was in Michaels when I decided I wanted to do just 1 more small St. Patrick's Day item. I'm not really into the holiday, but since I started blogging, I've seen the crafting value in every holiday. I made a lot of stuff for Valentine's Day, including 3 wreaths, and loved all of it.

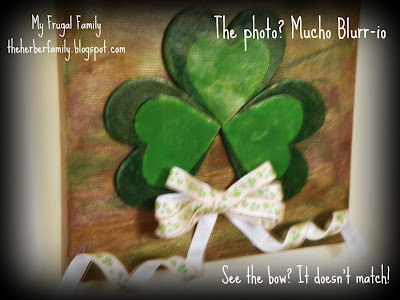
I wound up deciding (as I sat pondering the items) to make a wall hanging. I am not in love with the bows on it.

What I used:


1 Dollar Tree "Canvas" (it was pre-printed)
3 Wooden Hearts from Michaels
3 Foil Cardboard Hearts- On Hand
Shamrock printed ribbon from Michaels
Paint- On Hand
Goldish wide sheer ribbon- on hand, but I got it at Dollar Tree
Matte & Golden Shimmer Mod Podge- On Hand

I love the sign itself. I hate the ribbons used. I painted the canvas brown, then used "Shamrock Green", forest green, and darker brown to streak the canvas. I loved it! Lastly, I coated the canvas in golden shimmer mod podge, to give it a bit of that pot of gold feeling.


I painted the larger wooden hearts forest green, and the cardboard side of the foil hearts Shamrock green. Word of advice- if you have it, skip the cardboard and use wooden hearts, these things curled horribly, and kept tearing when I put my fingers on them. Mucho Re-paint-o.

I mod podged the cardboard hearts to the centers of the wooden hearts with matte finished. I wasn't going to add any gold to it, but it kind of stood out against the golden shimmer background, so I wound up adding a layer of golden shimmer.

Lastly, the ribbon. Oh, the ribbon.


I noticed right off the bat that the white shamrock ribbon was too white against the rich, earthy tones I had used. I had some thing sheer tan ribbon, so I added that, made a bow, glued it on, and called it good over night.

Looking at it today, I hated it (though, to be fair, I hadn't really loved it last night). Today, I got the bright idea to distress the ribbon with brown ink. It wasn't horrible, but not great. I have a regular green ink pad, so I used that, too. Big mistake- while that pad works for distressing the edges of paper, it really soaked into the ribbon, leaving green blobs.


Being truly frugal, I was not about to give up on that bow, so I glued it on. Let it sit. Ripped it back off. Dollar Tree plasticy canvas is a lot stronger than one would think, as it's held up to having the bow ripped off it twice now.


I decided to stain the ribbon with the left over coffee from this morning. It accomplished 2 things. 1- it washed all the ink distressing from it except two random, huge green blobs. 2- it stained it. Faintly. It was far more white now than it was before staining it, since it washed the ink off.

I finally gave up. I pitched the hideous bow. It was useless. I really do like my sign without it, but since I don't have a stem for the shamrock, I felt like I should have something there.

Well, whose going to judge my 3 leaf, stemless clover? No one, it's in my house, not an art museum!


And while this photo was taken early on, before the ribbon debacle,  this is what it looks like again. Well, except I did skip a step. That wide sheer ribbon I had? I used it to make a hanger for it. 


See? The top part, not the ugly bow.

This post is linked up at the link parties listed here.

Monday, February 15, 2010

Mod Podge Madness!

Over the weekend, I picked up a new bottle of Matte finished Mod Podge, and a bottle of Glossy finish, both on clearance at a local store for just $3 a bottle. Oh, the Mod Podge joy to be had!

I've been Mod Podging all weekend. All right, all right, not ALL weekend, but I have done quite a bit of Mod Podging.

First up- A Heart Shaped Springy Clip Thingy. Yes, I'm sure that was the technical name for it. Back before Christmas, I found a large basket packed full of craft supplies for just $2.99 at Goodwill, and it came with all these shaped clips on springy stands.

I was looking to make a last minute Valentine's Day decoration. I chose to paint the base and edges red. It was a Crimson color, which was supposed to be a bit more burgundy than red, but it was bright red when it came out. Ah well, red is red, right? I'm glad now that I know, before using it for something and messing it up because of the color.


I used 2 different black and white scrapbook papers to cut into hearts for the wooden clip, and distressed them with brown ink. I know, it would have looked better with black, but I wound up loving how the brown looked with it.


To mod podge them on, I used my gold Shimmer mod podge, and it turned out great. They reminded me of the Twilight book covers- all black, white, and red. Raegan thought they kind of reminded her of it, but not much. Either way, the girls had a birthday party on Saturday, so that was one of the items they included. The girl is also a Twilight nut like Raegan.

I wound up loving it so much, though, that I made a second one for myself last night.


Next, I did another springy thingy, this time a flower. I made it to match the sign I made for my niece Alex for her upcoming 3rd birthday. 


 After "finishing" this, I went back last night, and added a coat of silver glitter paint to the base.


Ignore the wand for now.
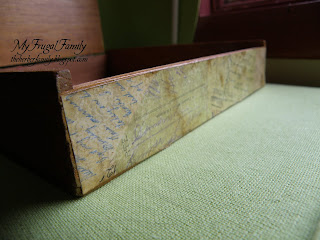
For my next project, I tackled my 1963 wooden Cigar box. My aunt yelled at me for Mod Podging an antique, but honestly, it's much nicer now, while still keeping the appearance it had, for the most part. Here's a before shot of the box, which I found for $.99 at Goodwill last month.


For this project, I bought some scrapbook paper that felt old- it's the backs of old post cards all written on. I cut it to fit the lid, then used brown distressing ink on it to age it more. I choose to use my Gold Shimmer Mod Podge on this, to help aid in the antiquing feel.


 When I was doing this, I got some mod podge on the unfinished wood, and loved the way it made it look. So, instead of mod podging the entire box with scrapbook paper, as I had planned, I stopped with just the front panel, and lid done. The Gold Shimmer Mod Podge gave the wood a nice, rich finish, which turning it gold. It looks great. 

In the photo below, you can see the difference in the finished and unfinished wood. The box itself never had a finish- it was just flat, dry wood. I left the bottom un-Podged, where as the visible sides are podged. It's a drastic difference! I also Mod Podged the entire inside of the box.
 

I want to find a small glass knob to attach to the lid of the box, to make it easier to open, but as it is, I love how my box turned out.

Last night, Nick and I went to the movies (Book of Eli- which I loved!), and to kill time, we stopped at Target, where I found the dollar spot ribbon spools. There are 6 spools of ribbon, 18 inches of ribbon on each spool, for $1. I love them, and used a lot of them at Christmas, so it was nice finding new ribbons. I picked 3 different ones.

Anyway, despite the late hour when we returned home, I got in the mood to craft. I didn't use any of that ribbon, but did use more Mod Podge!

Last week, I found a package of 16 wooden dowels on clearance for $.68, so I picked it up without a use in mind. Last night, as I was sorting out my wooden shapes, I saw the package of 10 Butterflies and 10 Flowers I got at Dollar Tree. An idea was born- Paint, then Mod Podge the shapes, and paint the dowel, then glue, and Viola! Magic wands for kids!

I started off with a heart shape I had, and made one for my Niece Alex to match the other items I've made so far.


I painted the heart green, then added flower paper to the front side of the heart. I distressed it with red ink, then added a layer of silver glitter paint, before using my Glossy Mod Podge to podge it. 

For the dowel, I painted it bright blue, then used the round head of a pin to polka dot it with the green paint. I added a layer of silver glitter paint, then used the glossy Mod Podge again.


I glued the heart onto the dowel with E6000, and let it sit over night, then took silver, green, blue, and pink ribbon, made a bow, and left long ribbon trails on it. It totally matches the sign and spring clip I've made for her, as well!

Speaking of the sign... When I made it, I didn't have paint to match the paper, so I stained the letter A with lavender ink, and used markers to color the sides. I did not love it. I went ahead this weekend, and painted the A blue.

Before:


After:
 

I do believe that is all my weekend crafts. Plenty of Mod Podge Goodness to be had! 
I did:
1 wand
3 Spring Clips
1 Cigar Box
1 Repainting on a Sign
I only have 1 more thing to do for Alex's birthday- her ALEX banner, similar to my LOVE banner I made for Valentine's Day. I have to get some colorful felt yet, but I have a lot of brightly colored ribbon for it. I may also make a crown she can wear from felt to match.

This post is linked up at the link parties listed here.

Wednesday, January 27, 2010

Talented Tuesday = Talented Ladies!

I just went through all 120 links on my weekly Talented Tuesday party, and I'm just in awe at some of the completely awesome things I got to see. I'm really glad I decided to start a weekly link party, because you ladies have been totally inspiring me!

And seriously- 120 links!! The amount of talent out there is just astonishing. You ladies really are an amazing bunch!

Today I didn't do a single thing crafty. I'm sure I've mentioned it before, but I'm a total insomniac. Normally, my issue is falling asleep. I can't do it until I've totally exhausted myself. Well, imagine my delight last night, when I fell asleep before midnight! That's like super early for me, when many nights, I see the wrong side of 4am.

However, it was not a peaceful sleep. I kept waking up. I finally gave in at 2:30, and was up for the day. The little sleep I did get, though, was helpful, as I was productive today in non-crafty ways. For starters, I did the first major grocery shopping trip since I broke my rear. What's really scary, though, is that we were due to go grocery shopping the weekend after I broke my butt- almost 3 weeks ago.

I've done quick shops here and there, and sent hubby for things, but no long, planned out grocery shopping trip. Since I knew I wanted to do that (actually, at 4am, I wanted to, but I resisted the urge to go out and shop in the middle of the night, though out grocery store is a 24 hour one), I opted to shower this morning. I hate, hate, hate morning showers, so I never take them unless I have to. My greasy hair told me I had to. Ok, it wasn't that bad, but it was driving me nuts.

Now, because I wanted to shower, that meant taking Gilly to school, instead of waiting for the bus. It wrapped up neatly. I could dwadle a bit, since the bus comes at 8:10, but school doesn't start till 8:45. That, and the school is only a bit further than the grocery store, so I could stop there on the way home.

The only flaw- I got there, and (thankfully) checked for my debit card when I was getting a cart, and realized it was safe & sound... in the jeans I wore on Saturday to Chuck E Cheese for a belated birthday party for Chris & Gilly. Oops!

Ran home, and went back to the store. I'm really glad I checked when I did, otherwise, I'd have been really embarrassed at the check out counter. I loaded down on things we needed, and followed a meal plan. That makes grocery shopping easier, and most the time, cheaper. I plan my meals around sale prices, so we can eat as cheaply as possible, while still getting variety.

Some of the big things for the next two weeks? Sloppy Joes, Chili, Chicken Stew, and a Taco night, along with stand-by favorites like pasta, pizza, turkey-burger helper, etc. I picked up hash browns, too, since we have eggs and sausage, so we'll make a nice big breakfast on Sunday.

It was just after 10 by the time I finally left the grocery store, and I opted to run by Goodwill real quick. Remember my project earlier this week? Well, I decided I wanted to see if there were any more of those pictures at the As-Is side. When I was in last week, there must have been 10-15 of them, split between 2 different designs (did I mention they were brand new donations?).


I lucked out, and found 3 of the other design, though I opted to only grab 2. I have an idea for one, and the other will sit and wait for inspiration, or maybe to make a similar one to my first one for a gift or something.

I also found a long wooden drawer organizer- like a silverware organizer, but a lot longer. It'll fit very nicely in my craft desk, and maybe help me to bestow some organization on that mess. I seriously need to spend 2-3 days just gutting that area, and re-organizing all of it. It needs it that badly. If not worse.

All right, that's all out of me for the night. I hope to do another craft post tomorrow or Friday! In the mean time, keep creating amazing things!

In the mean time, here are some of the projects I started yesterday that I want to finish up soon!


(These are all pre-fixing, none of these have been done over in the photos above!)

Wednesday, January 13, 2010

Invalid Craft Time

I'm really surprised at how much it hurts to do little things. Sitting up. Walking. Standing up. Wiggling around. Scooting a chair. It all hurts! I've been spending way too much time in bed, and I just want to DO something! Yesterday, I assembled a bucket of craft items to use while I'm laying down.

I've watched my fill of movies. I've read 2 books, cover to cover, and finished a 3rd. I'm bored.

While none of my Invalid Crafts are what I would consider genius or something totally outstanding, they are, at the very least, giving me something to do.

Last night, I attempted to make a Valentine pocket to put treats in. It was cute, but small. Today, I found a cute basket in my back room, and decided to make it a Valentine's Basket, and found something to do with the little pocket I made.


This was easy enough to do. For the pocket, I started off with 1 heart shape, and I whip stitched it to a piece of plain red felt. Well, the felt puckered a bit, and pulled, and all together did not lie flat, so I cut it into a larger heart shape, and whip stitched it to a piece of white felt.

I decided halfway through stitching it to make it a pocket, instead of a full applique, so I only stitched the sides of the heart to the white. Once done, I opted to cut the white into a heart shape. The very last thing I did, which really should have been the very first thing, was sew a dark red button to the middle of the heart.


For the basket, I started by just winding thin pink ribbon around the edge of the basket. I like it- it's cute! Then, I opted to cut two slits in the back of my little pocket, and string it up, then attach it to the basket. I think it looks darling, but in my slightly drug dazed stupor, I think most things are darling. (I don't write that to mean I'm totally off my rocker and drugged out, but I do have a sensitivity to most medications, and while I do try to go as long as possible without them, my body aches badly even just laying down when I haven't taken them, and things like tylenol, heating pads, motrin, and ice are not helping much yet)

Lastly, or not, I wound what little tulle I had on hand around the handle. Maybe I'm not so in love with that. I imagined it puffy. It looked odd puffy, so I tugged it tight. I don't love it, so it may not stay. Probably it won't stay. Apparently, aforementioned slightly drug dazed stupor does not make all things darling.


As I said, it might not have been the last step, because the real last step was by far my favorite. I loaded it down with left over Christmas candy in red, silver, and oddly, purple. The purple is my favorite, and it's a nice Valentine type color.


All in all, not a bad little fix up for a basket I paid $.79 for at Goodwill. If you have baskets as part of your decor, this would be an easy way to fix them up for various holidays- a cute felt shape and some ribbon, which is all easily removed, but adds just a touch of holiday to the decor.


http://www.thethriftyhome.com


Photobucket


The Shabby Chic Cottage


Decor Mamma