Wednesday, March 31, 2010

Homemade Birthday Gifts

Next week, my niece Alexandria (Alex for short) turns 3. She's our Easter baby, and was born on Good Friday. For her birthday this year, my sister Brooke asked me to make her a wall hanging for her bedroom. I did- then I kept going, matching other items to it.

So far, I've posted all of them except the last two- which I only just did today.

First up today, I made her a banner for her bedroom. Alex has learned to spell ALEX, and loves anything with her name on it, or her first letter. I've focused on that with several of her gifts.

Name Banner


You'll Need:
Foam Shapes- Dollar Tree has many right now! 1 pack has 24 of 1 shape in 6 assorted colors for $1
Foam Sheets- Dollar Tree, again- 32 small sheets for $1
Hot Glue
Ribbon

  1. Start by picking your colors. I chose to go with an assortment of bright colors, and mixed them all up together. 
  2. Next, I used the shaped foam to make a template on the square foam, so I knew what size to make the letters. I just traced the top and bottom outline, since all the shapes were wider than the plain foam. Once I did that, I used a ruler to help make letter shapes- remember to do the letters backwards!
  3. Cut the letters, and hot glue them onto the foam shapes.
  4. To attach them, you could sew them together, or sew them to ribbon. I chose to cut small lengths of ribbon, and hot glue them each together. For the two ends, I made the ribbon much longer, and added ribbon tails to it with 3 other ribbons.


Tada- all done! I would say it took me about 30 minutes to do, but it really didn't feel time consuming. I had planned to sew her a banner with felt- this was MUCH faster, and so fun! Alex can use it at her birthday party, and then hang it in her room.

Costs-
Foam Shapes- 24/$1 x 2, 10 used for a total of $.42 worth of foam shapes.
Foam Sheets- 32/$1 x 1, 11 used (1 OOPS) for a total of $.34 worth of foam
Ribbon- $3.99/5 yards, 1 yard used- $1.25 worth of main ribbon
Ribbon 2- $1/3 yards, 1/2 yard used- $.17 worth of ribbon
Ribbon 3- $1/3 yards, 1/2 yard used- $.17 worth of ribbon
Ribbon 4- $.40/3 yards, 1/2 yard used- $0.07 worth of ribbon

Total Costs- $2.42 (yes, I was being nit-picky... I hate saying "on hand", when it was still bought whether I owned it before or FOR the project)


Next up... A Beach Bag!

I loved the beach bag I made over the weekend out of placemats, and thought Alex would love one as well. This one I made a little different. I had a hard time finding bright colored placemats that were fabric. The Dollar Tree had them in plastic, and those round wicker-y type things, but not fabric. So...

Beach Bag

You'll Need:
2 Dish Towels
2 Belts
Scrap Fabric & Ribbon
Sewing Machine


I loved those towels when I saw them!

  1. The dish towel is going to be larger than you need, but it works out great- because they are also much thinner than you need, material wise. Fold it in half, and stitch up the open ends, to make 1, double the thickness pad of material. For me, it did not come out evenly shaped, so I sewed straight lines, and trimmed excess fabric.
  2. Once both towels are sewn into the right size 'pads', I attached my appliques. MUCH easier when it's not already a bag, for the record. In this instance, I chose to do 2 appliques, one is the letter A, and the other is a pair of flip flops. I  used the paper pattern I created yesterday to make the flip flops again today. This time, I sewed it with a wide, close together zig zag stitch. I chose a purple fabric to match the purple straps. For the letter A, I stitched ribbon right onto the fabric. It worked beautifully, and brought in the colors yellow, orange, pink and green. I stitched it with a decorative flower stitch.
  3. Once your appliques are done, sew the handles onto the fabric. I started on the free end each time, so that it would leave as much extra for the handle as possible. I used a zig zag stitch, though if you want a neat clean look, twin rows of single straight stitches would look nicer, in the same or contrasting color. For my belts, I chose to sew them on with the pattern against the fabric. It's still visible on the handles, and matches the colors on the towels, but it felt like too much running all the way down the straps.
  4. When both handles are attached, pin the two sides together from the middle of the bottom, attempting to match the handle straps up as much as possible. Stitch the sides and bottom all closed, trim the excess fabric, and turn it right side out.
You're done!


It also worked as a wonderful "gift" bag for the items I've made for her! All of them are inside it, nice and neat!


This project took about 30 minutes, start to finish, but might be able to be done faster without the appliques. It is super cute, though, and I love how this one turned out. I'm tempted to start making these to sell. Tempted. Not sure I will, though.

Cost-
Towels: $1/each at Dollar Tree
Belts: $1/each at Dollar Tree

Total: $4

On top of these two projects, I made Alex
She's going to just love these, and it's not another box to cut apart, and another toy to be forgotten in 2 days.


Tuesday, March 30, 2010

Flip Flop Appliques

I debated on whether or not to add this to the prior post about my Beach Bag, or to post a new post about the Flip Flops. Obviously, I chose a new post.

I was standing in my craft room this morning, lecturing the cats on why they do not get to climb around on Mommy's Craft Stuff, when I was hit with inspiration! Why not try my hand at an applique on the beach bag? I have never appliqued before, and wasn't sure if I was up to the task, but I decided to at least try it.

Here's the finished bag BEFORE adding the Flip Flops


You'll Need:
1 Finished Beach Bag- though, honestly, this would have been far easier to add on an unfinished beach bag!
Fabric Scraps- Bright colors are a must for summer fun!
Ribbon Scraps
Sewing Machine
Pre-school Writing Paper (you know, the kind with the huge lines for learning letters? It's lighter weight than regular paper, and worked great for a pattern)


  1. I free hand drew a flip flop shape. If I, the drawing challenged, can do it, so can you. I only drew one, since the pattern could be "flip flopped" over to the other side for the matching Flip Flop. I also made a pattern for the "thong" part of the flip flop, but the fabric thong flopped, so I didn't use it.
  2. Cut the pattern out of your fabric, making sure to turn the pattern over for the second flip flop. This should give you a pair of flip flops.
  3. Fold your ribbon into a V shape, and pick a spot on the toe area where you want it added. Leave extra hanging off- I didn't, and my first one didn't meet up to the edge exactly. Oops! Once it's in place, prepare to sew.
  4. I used a cute little star shaped stitch to go straight down the middle of the ribbon, and I used pink thread. The ribbon I chose had a green stitch mark along both sides, and I didn't want to cover that, so I went with a decorative stitch. A straight or zig zag would also work fine.
  5. Once the ribbon is added, position the flip flops on your bag where you want them, and pin them into place- you won't use more than 2-3 pins each, or they'll wrinkle a bit. After the first few stitches on mine, I removed the pins all together. For my stitch, I once again chose decorative, and used a wavy line to stitch all the way around the flip flop. It worked great, and allowed me to move the fabric around without it looking like it was messing up the stitch at all. Repeat on flip flop number two, and you are done!
Being a first timer, it took me maybe 15 minutes to do this, start to finish. I used the slowest stitch speed on my machine, then increased it to just below the medium stitch speed. I tend to mess up more at high speeds, so slow and easy did it for me.

Cost- Free! Use scraps!!


Isn't it a cute addition to my beach bag? I love it- seriously, it really makes it look beachy! Not bad for $4!

Summer- please come soon, ok?


This post is linked up at the link parties listed here

Monday, March 29, 2010

Talented Tuesday!

Interested in sponsoring next week's Talented Tuesday post with your own crafts, shop items, or a tutorial? Check out the details here!

For today's post, I'm featuring a trio of Dollar Store crafts I did over the weekend. All small, quick projects, but fun! First up is a craft I made for this week's challenge over at Dollar Store Crafts. The challenge required the use of place mats. 


We've seen purses, pillows, even diaper wipe covers made from them. I didn't want to do something I've seen before, but I was stumped. Finally, I saw something in the store that was perfect- belts. Thus, my idea was born.


Dollar Store Beach Bag


You'll Need:
2 woven belts
2 woven placemats
Scissors
Sewing Machine
10 minutes- yes, 10 minutes.


  1. First, cut the end tab and the buckle off the belt. I cut a bit of excess off at the buckle, in case I find a use for them at some point.
  2. Pin the placemats wrong side out together, end to end. Sew the short ends together. 
  3. These belts were so thick, I could not pin the belts into place. I had to hold them into place as I sewed. I did my best to match them- you'll see how well THAT went later. I just sewed them so that the two ends were both on the same side of the placemat- it forms an upside down U so that the "handles" go all the way down the bag. Did that make sense?
  4. Once the handles are sewn on both sides, turn the bag inside out again, and just do a quick zig zag across the bottom. I clipped the corners to try and get straight corners when I turned it right side out. I failed.


Notes-

This was SUPER easy, and is somewhat customizable, though it really depends on the colors of place mats available at any given time, and the availability of the belts. You could mix and match colors, or check your local thrift store, as well.  

Costs:

$4 total- $1 each for place mats, and $1 each for 2 belts.


Want some cute Flip Flop appliques on your bag? Check out the tutorial I made for that! I added cute little Flip Flops to my bag today, and posted all about it.


Next, how about some SUPER quickies?


Flower & Butterfly Magnets

You'll Need:

Sheer Butterflies (2 large for $1 or 3 medium for $1 at DT)
Ribbon & Flower sets ($1 for 2 ribbons & a few assorted single color flowers at DT)
Hot Glue
Magnets (a great way to use up promotional magnets!)
Wire Cutters

  1. First, the butterflies each have wire on the back- clip that off with the wire cutters, or OLD, CRAPPY scissors (not new ones, or good ones!!)
  2. Add a dot of hot glue to a magnet, and press the butterfly onto a magnet.
  3. For the flowers, I did 2 layer, 2 color flowers. Glue a small flower onto a larger flower, then glue it onto a magnet.
 Costs- $2

These will be another magnet set for my niece Alex's magnet board that I made for her birthday!


And for 1 last Dollar Store craft...

Bunny Picks

These are something cute I found on the DSC's website, and they were too adorable not to make! Especially since I had EVERYTHING on hand! I had extra egg picks from making a quick wreath, so waste not, want not!

You'll Need:

Egg Picks, or Plastic Eggs
Pom Poms- White & colors
Googly Eyes
Hot Glue
Felt- White & colors

  1. Cut bunny ears in 2 colors, with white being smaller than the color. Glue the smaller portion onto the larger portion.
  2. Glue the ears to the egg on the backside, so the white middle is showing to the front.
  3. Take 2 white pom poms and 1 colorful pom pom. Glue them together in a triangle.
  4. Glue the triangle to the bottom front of the egg, with the color forming the top point of the triangle.
  5. Glue two google eyes to the front of the egg, above the triangle.
  6. Lather, Rinse, Repeat! You're done!


Costs:

FREE or up, depending on what you have on hand! I was able to make 5!

Don't they look cute in my flowers? I had stuffed all the fake flowers I had into a vase simply for storage. I did the same with the bunnies, but now? I think they'll wind up going on the table on Easter Sunday.

This post is linked up at the link parties listed here

Now... without further ado.... Talented Tuesday!


The Rules


1) Post a blog about something you've made- a refurnish, recipes, a craft project, a sewing project, room decoration, anything you've done!

2) Add a link to your blog post- not to the blog itself, but to the individual posts! You can post more than one project, just add more links! The links should look something like:

http://theherberfamily.blogspot.com/2010/01/love-banner.html

and NOT like this:

http://theherberfamily.blogspot.com/

3) Add the code below to each post you link to the MckLinky, so that others can post their projects here as well! The list will accept new links through Saturday, so if you make something new, come back and post it! Don't forget to look at the links on the list, and let people know where you found their post at!

This MckLinky will remain open and accepting links through Thursday evening!! 


Photobucket


Fabric.com Sale!


This weekend, I went to Jo-Ann Fabrics, where I bought something that A) I thought was $9.99 a yard, and B) thought was included in the Home Decor Fabrics Sale at 40% off.

I was then A) Shocked and B) Speechless when the fabric that should have cost roughly $6 a yard wound up being $17.99 a YARD!

I about died. Hubby, of course, said "So what, you like it, right? Buy it!" I, of course, did.

Today, I looked through Fabric.com to see if they had any good steals. Of course, they did. I found a cute, very similar medium weight fabric to recover a really cool chair, and I got it for under $5 a yard.

Better yet? They have a sale on all clearance fabrics!

Enter in clearance323 at checkout, and all your clearance items will drop in price by 30%!!

Should you wind up spending $35 or more, you can also get free shipping. But, the prices are low to begin with, so it may take quite a bit of fabric to do that!

They also have other items for crafting, including scrapbooking!

This is the fabric I ordered.


Upon going back to the site, I found more fabric I love even more, though, for a similar price. I may just have to order more, because how CUTE is THIS one?


And I also REALLY like this one:


All of these are home decor fabrics, suitable for making slip covers, or in my case, recovering a chair. I don't know if I would want that last one in a large quantity, but it'll take less than 1/2 a yard to re-do the chair I have, which is just about right.

The chair I keep mentioning? Oh, a total Goodwill SNAG. OMG, I was in love when I saw it!


I did a bit of research. The name on the bottom matches up with a New York furniture company that was around in mid 40's through the early 50's. It's sturdy, it doesn't wobble at all. It's gorgeous- or will be. The vinyl is all in great shape- it isn't cracked or torn at all. But, I want something prettier for my craft space!

I've never recovered a chair, so I'm excited to try it! I'll spray the frame a fun color, too. If I order that last fabric, I think a nice light blue would set the colors off without being too obnoxiously bright. The fabric I have here is bright stripes, very beach-like, and when we were looking at spray paints, the pale blue looked great against it. So did yellow.

Either way, the frame does need a spray job, as the paint is scuffed and marked up on the chair.

Isn't it fabulous, though? Go ahead, you may bask in the glory of it.

Aunt Deb's Wall

My Aunt recently bought a lovely new house, and with that lovely new house, came lovely empty walls. Which, of course, she would like filled. Going on very little, this is what I came up with for her new dining room. The room has 1 wall painted sage green, and she added a sand colored table runner and table cloth to the table.


You'll Need:

Mod Podge
1" bristle paint brush (3/$1 at DT)
Wooden Embellishments ($1.99 at Hobby Lobby, $2.99 at Michaels)
Scrapbook Paper
Paint
Distress Ink (I used a color called Peeled Paint)
3 Saints pictures from DT
Sand Paper


The wooden embellishments

  1. Because the paint will need time to dry, start this process first. I painted my embellishments all Ivory color. I wound up needing 2 coats, but next time, I think I'd choose to use spray paint for reasons I'll note below.
  2. Once the embellishment is covered and dry, water down your brush, and use a second color. I choose Moss Green. Water down the paint with the brush, and cover the object, paying close mind to fill in crevices, creases, dimples, etc. Let it set for just a moment, then use a slightly damp paper towel to wipe the paint off. This should leave just a slight hint of color in the creases.
  3. After it has dried completely again, I took my Peeled Paint distress ink, and just brushed it against the surface, so that some ridges were brushed with a deep sage green color.
Note about these embellishments:

I'm not sure if it was the paint I used, or the quality of the wooden embellishments, but every last one of them showed little surface cracks, and the tops were peeling from the backs after I painted them. Given that I used 4 different packs, and 3 different designs, I think it was the quality of the embellishments, and not the paint. One of them even had to be glued together. I have used these once before, and spray painted them first, and they did not do this. Maybe it was a bad lot, but given that it was 4 packs and 3 different designs, I'm not sure.


The picture
  1.  Sand the surface of your picture down, first. The Mod Podge will adhere better. Once it is sanded, make sure to thou roughly wipe it down, so that the dust is all gone.
  2. Measure the paper- I measured it wide enough to wrap around the edges. Cut it out, and set it aside. 
  3. Apply a thin layer of Mod Podge to the front of the picture. I chose to use Matte finished. Once it's coated, smooth the paper on. In my case, I turned the paper upside down, and put the picture down on it so I could more easily center it. Using pressure, your hand, your distress ink- whatever you have, smooth out the paper as it dries, to limit or eliminate wrinkles. 
  4. Once it's dry, choose your next paper. For my second paper, I ripped a sheet of cream colored, slightly pearlized scrapbook paper in half, then tore the remaining edges. Once torn, I distressed each edge.
  5. Mod podge the paper onto the center, paying close attention to smoothing out wrinkles. If you are happy with the over all picture at this point, and have no desire to add to the basic design, Mod Podge over the entire surface for a top coat, and let dry.
  6. Once it's dry, take your now dry wooden embellishments, arrange them how you like, and hot glue them into place.
  7. Lastly, seal the wood with a coat of Mod Podge.


 My total costs:

Wooden Embellishments: $8
Scrapbook Paper: $1.35
Saints Pictures- $3
Paint, Ink, Mod Podge- Pennies, it was on hand, and reusable

Total Cost: Roughly $12.50 for 3 8x10 Wall Hangings


This post is linked up at the link parties listed here.

Free Smilebox 14 Da Trial!


Easter Online greetings, scrapbooks, slideshows

Sunday, March 28, 2010

St. Patty's Day Catch Up

This year, I had an idea for a cute little basket for the kids. And I made it. I even photographed it. A day late. Cause, I forgot to give it to the kids ON St. Patrick's Day. Oops. And, then, in Epic Blogging Fail, I forgot to post it.

So, bask in the glory!


To make this:

1 sheet of Shamrock Scrapbook Paper ($.59 spent)
1 Green Metal Bucket, Dollar Spot at Target ($1 spent)
3 Candy Sticks each, $.10/ea at Cracker Barrel- I went with Lemon, Lemon Lime, and Green Apple for shades of green, and yellow. ($.90 total spent)
Green & Silver Hershey's Kisses left from after Christmas purchases (dirt cheap)
1 Green Ink Pad (on hand from Christmas)
Green Good Luck Stamp, $1 at Michaels (on hand with no purpose)
Shamrock Ribbon, $1 at Michaels (on hand from a Shamrock project)

Total spent FOR this project:
$2.49

Total spent including on hand items:

$7ish.

I cut circles of the scrapbook paper, then distressed the plain white side, stamped the kids names on it, and added the "Good Luck" stamp as well. Then, punch a hole, and tie it around 3 candy sticks with the shamrock ribbon.

I added a larger circle to the front of the bucket, and tied it right with the ribbon the bucket came with. I distressed it, and added the Good Luck stamp again.

To keep the candy sticks standing, I filled the bucket in with the Hershey's Kisses.

While I may be a -tad- bit over due in posting this, it would be really cute in pastel colors for Easter!

This post is linked up at the link parties listed here.

Dollar Store Magnet Board

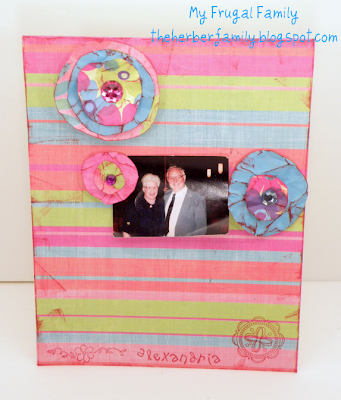
Last week, I was the guest host at one of my favorite craft sites, Dollar Store Crafts. The project I made for the site is a magnet board, which was made for very little money, and totally customized.

I had meant to post about it here as well, and never got around to it. Here are a few pictures of the board I made, and a link to the tutorial over at DSC's!


This would make a cute picture frame, and a totally customizable gift for a graduate, bride, or teacher!

This post is linked up at the link parties listed here.

Saturday, March 27, 2010

Bathing suits for teens

Have you ever taken your teenage daughter swim suit shopping and left completely happy? Two years ago, Raegan got a bikini with a little skirt on it. She was barely 12, but blossoming, and I decided last year to limit the options to tankinis or 1 piece suits, only. I just am not a fan of letting my then 13 year old daughter strutting around in a teeny tiny bikini.

After all, there is no in between at that age. She went from kids suits, which cover a lot more, to adult sizes, which cover... a LOT less.

Last week, I started to set dates & reservations for our Spring Break getaway. I'm taking the kids away over night for some fun, including a hotel with an indoor pool. Rae's suit from last year doesn't fit, because we squeezed her into a kids tankini, which she had mostly outgrown before summer was over. There was no getting around it- I had to shop in the junior's department this year.

Well, after browsing online, I conceded some points with her. She wanted a bikini. I wanted a suit of armor. We wound up coming to a mutual decision after I joked around- I asked her if she'd just like a set of boy's swim trunks, and a t-shirt. She loved the boys trunks idea. Oh, boy.

We went to Target tonight, and looked at what they had. There was a pair of black trunks with pirate skulls on them- she loved em. Tops were harder to come by, and she wound up choosing a bikini top. A rather too skimpy for me top, but it actually was more covering than the other one she tried on.

The top is black and white plaid with little metal studs on it. She loves it. I, on the other hand, nearly fainted when my almost 14 year old daughter came out of the dressing room wearing it, and looking like she has the body of a 16 year old. SO. SCARY.

I'd much prefer that suit of armor. In the mean time, I'm going to require t-shirts.

Wednesday, March 24, 2010

Contest! Blogy-giveaways! Fun, Fun, Fun!

I am currently giving away 3 prizes in a contest- the catch is, the contest is on another blog. A blog my friend Sarah runs, called Sarah's Deals. The site is awesome. If you've ever gotten to the cashier at a grocery store, and winced at the cost, you seriously need to check her stuff out.

She posts all sorts of crazy awesome deals with coupons and sales, for both in store and online! Check. Her. Out. I'll wait.

Have you done it?

Ok, then, on to the contests.


1 winner will win a $20 Graphics prize pack. Included in this prize pack are a customized banner for your kick butt blog, and up to 5 buttons for the blog. If you currently use graphics everyone else uses, you want this. Trust me! It's great having something totally unique and all your own!

To enter the graphics contest, go here. To gain entries, do the following:

Required Entry - Post on your blog or website about that you are entering this giveaway (include a link to the giveaway), then come back and comment with a link to your post.

Bonus Entry -
Become a Fan of My Frugal Family on Facebook, then come back and comment that you did AND note what your website/blog is.

Bonus Entries -
Encourage your readers/friends/fans to come here and comment on your behalf. Each reader/friend/fan may comment on your behalf one time. They must comment on the name of yourblog/website AND leave their email address.

Winner will be chosen from all eligible entries received by 3/31/10 at Noon EST. Random.org will be used to pick the winner.


(Remember- do that over at Sarah's Deals, NOT here on My Frugal Family!) 


 2 Winners will each be picked to win one customized Barn Star Wall Art. The art will be the same as what I made earlier this week, but customized to the colors & patterns you choose. How awesome is that? I'll tell you! It's TOTALLY awesome!

To enter the Wall Art contest, go here. To gain entries, do the following:

**ALL entries must include email address...entries will be deleted if they do not include email address**

Required Entry - Visit My Frugal Family, then come back here and comment with your email address on your favorite craft.

Bonus Entry - Be a Fan of My Frugal Family on Facebook, then come back here and comment with your email address that you are.

Bonus Entry - Tweet the link to this giveaway on Twitter, then come back and comment with the link to your tweet and your email address.

Bonus Entry
- Link this giveaway on your Facebook status and tag @Sarah's Deals (so it shows on Fan Page), then come back and comment with youremail address.

2 winners will be picked randomly using Random.org next Wednesday, March 31st at Noon EST.

Remember- to enter the contests, post your comments over at Sarah's Deals blog! That's where the contest is being run!!

Good luck!!